

Hey folks, Bailey again and welcome back to Dank Lists Wargaming’s How to BUILD! This week, we focus on getting the most out of your bitz collection and eBay lot purchases by building Ravenwing Black Knights using 100% Games Workshop plastic without resorting to fashioning sprues.
A while back, I bought a large Ravenwing lot off eBay that then rested at the bottom of a box because of the new Primaris Outrider bikes. If you want to know how to turn those into a Ravenwing unit, please check out our article here. With the return of Weapons from the Dark Age in the Dark Angels codex, I decided I finally needed to acquire some Black Knights.
The problem for me lies in the lack of supply of Games Workshop products at the moment due to COVID-19. When certain kits become hard to find, I turn to one of my favorite aspects of the hobby. I make it myself. Luckily for you, the reader, I started documenting these adventures in hobbying when I started this blog so that you too can enjoy your models and not worry about using 3rd party bits or models for tournaments once COVID finally goes away.
To start this project, I went to a couple of different bitz boxes. I selected an old biker mostly built from an old eBay lot I purchased a while back to serve as my base. I got into my old Warhammer Fantasy Empire bitz box to find the warhammer arms from the Knights’ kit. I then dug around in my Dark Angels bitz box for plasma pistols. I use the Ravenwing Upgrade sprue to add the appropriate Ravenwing accoutrements where needed. Finally, I get a shoulder pad and a powerpack from the Dark Angels Veteran Box.
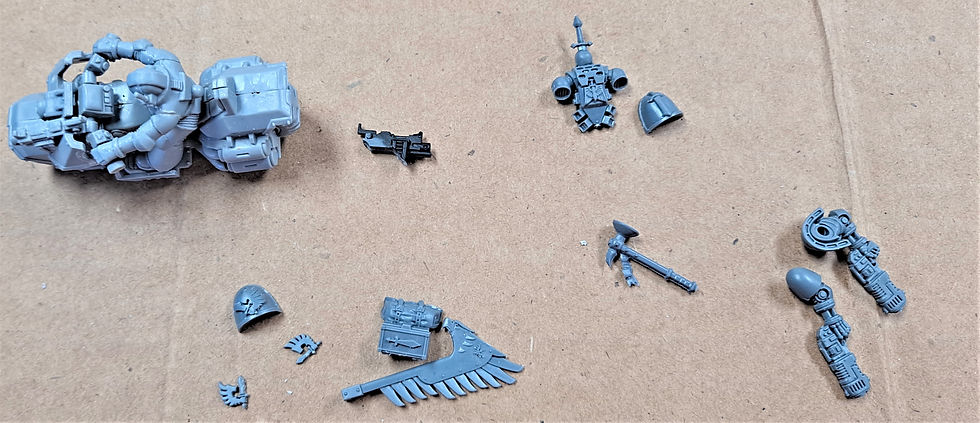
I always clean up all my mold lines and sprue nubs before I build my models because my reliance on dry brushing as a painting technique requires smooth surfaces to make the final product look good.
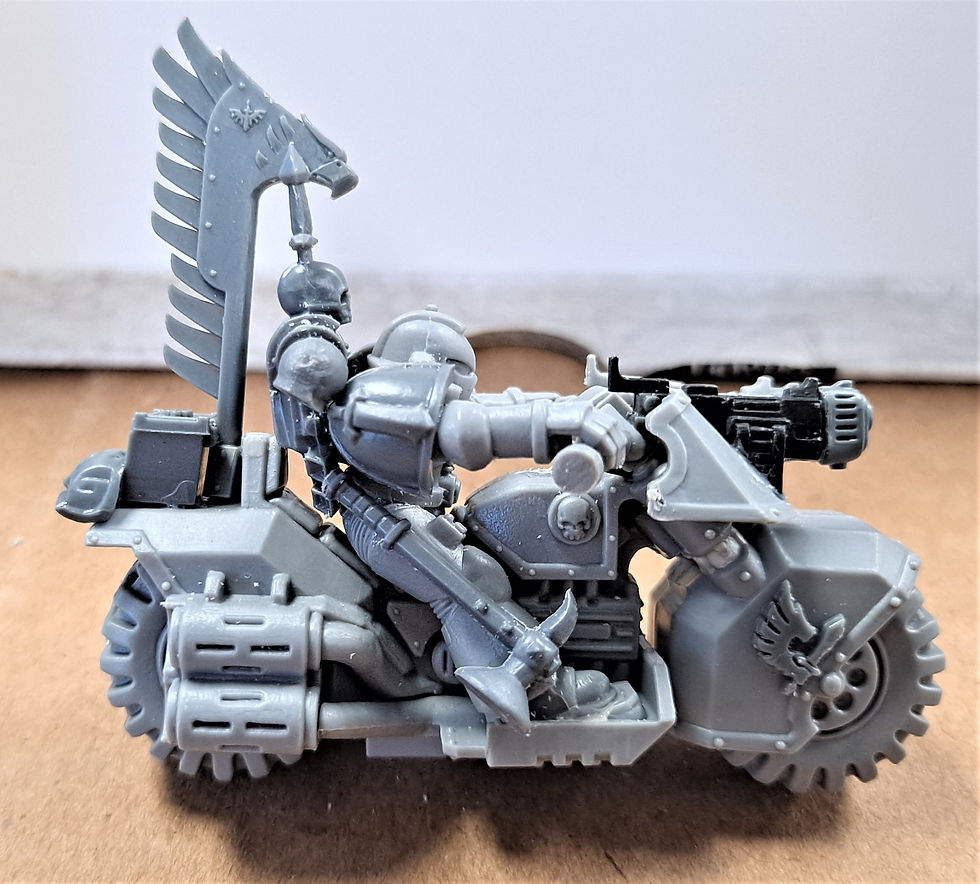
The first part of the build consists of the Plasma Talon array.
First, I add a bolter to fill the missing bolter slot.


I use my Citadel Snips to remove the bolter ends from the Twin Bolter array at the front of the bike. I file the areas down where I removed the bolters to make it smooth to receive the plasma.


Next, I snip off the ends of the plasma pistols and file them down.


Wherever I remove pieces, I need to make sure I file them down flat especially if I use clippers. If you use clippers, make sure to cut more than you end so there is room to file. The clippers usually cut to a point and you don’t want to glue a point to the flat surface of the bike front plate.
I glue them to the newly cleaned bolters.


I continue to work on the front of the model by applying the Ravenwing Sigils on the front tire covers.


I move from the front to the back. Since this is a rescue model, the body of the marine is already stuck fast to the bike so in order to fit a power pack onto this model I need to remove the round nub meant to receive a power pack in order to slide a power pack into place properly. The size of the nub prevents this otherwise. If this wasn’t a rescue model, I would have tried to put the power pack on before I glued the model to the bike. I use my snips to remove the back pack receiver bump from the back of the model before filing the area smooth.


Now the nub isn’t there, I need to hold the power pack in place until it is dry.


I immediately follow up the power pack with the Ravenwing back banner so I can make adjustments if needed to accommodate the power pack and the banner. Due to the biker leaning to one side, it made it easier to move the power pack to one side.


I finish up the back by adding a Ravenwing baggage bit.


I decided that since these are Ravenwing Knights, it would differentiate them from regular bikes by adding this bit. A sword with a golden hilt and silver blade on a black background will separate them visually from the bare black backgrounds on the regular bikers and make it easier for my opponent to figure out which is which. People know knights for their swords after all despite this knight carrying a warhammer.
I put the Ravenwing shoulder pad on the left. Then, I put the sword pad on the right.


Speaking of swords and warhammers, I plan to add a warhammer onto the right leg of my biker.
Before I can do it, however, I need to remove a ribbon blowing the breeze from the handle of the warhammer. It won’t make sense for the ribbon to flutter perpendicular to the wind if I just put it directly onto my biker. I remember to file it too.


All my other bikers wield their hammers in their right hand and I feel putting the hammer handle up the right side makes it easier for him to draw it when needed. The bulky and rounded nature of the bike’s body makes a cross body weapon draw nonsensical to me.


With the hammer attached in a way similar to the chainsword on the Outrider sergeant, I am done.


I hope this article inspired you to make your own Black Knights. I went on to make two more so I could field a minimum squad. If you enjoyed or were inspired by this article, please check out our other How to Build!: Ravenwing articles on this blog. If you prefer videos to articles, please visit our Youtube channel here. For other hobby tips as well as tactical tricks, you can watch and listen to the March episode of The Path to Redemption here. Or, if you want to just listen, find the audio only file on the Dank Lists Wargaming website here thanks to Anchor.fm.
Until next time,
Keep it Dank,
Bailey
Comments